- Step 1 - What kind of contacts are in your list
- Step 2 - Import a List
- Step 3 - Map your file to Salesgenie
- Step 4 - Add tags to your contacts (optional)
Uploading your customer data to your Salesgenie account is easy. You will start with the "My Lists" page.
There are two ways to get to "My Lists".
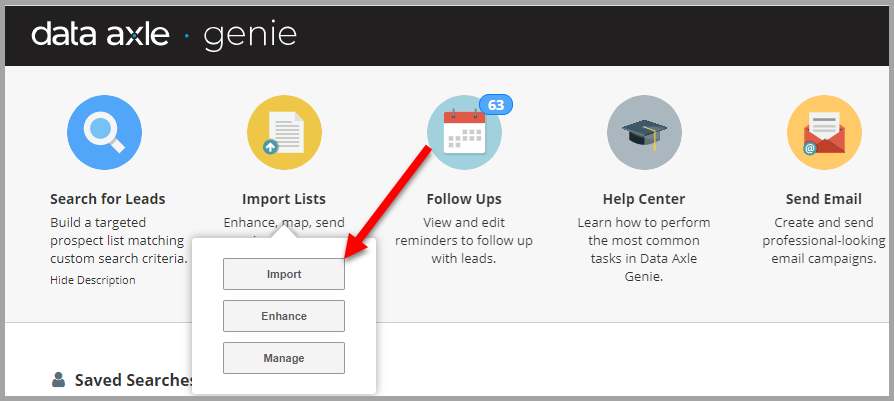
From the Home Dashboard:
- Click "Import Lists" and select "Import".
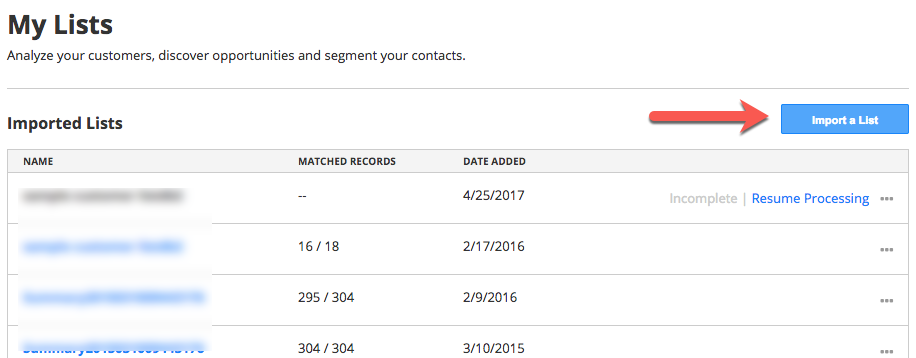
From the "My Lists" screen, click "Import a List".
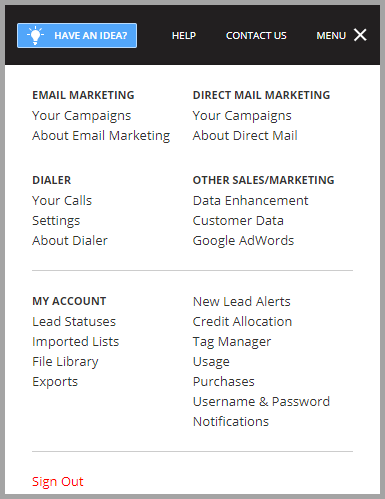
2. Click “Menu” and "Imported Lists".
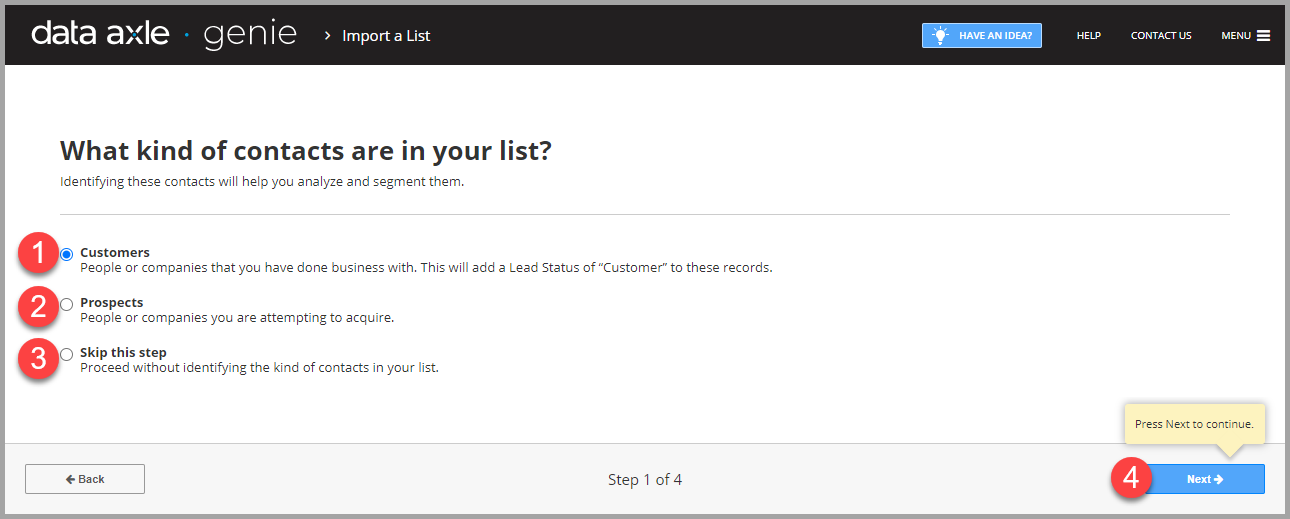
What kind of contacts are in your list? - Step 1 of 4
Choose what type of list you're importing. Select one of the three options:
- Customers
- Prospects
- Skip this step
- Click Next
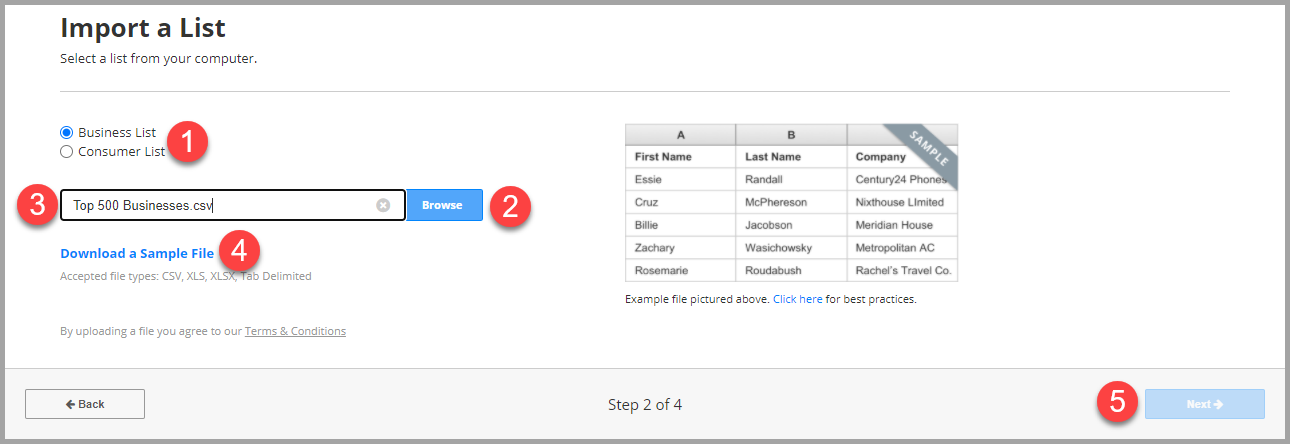
Import a List - Step 2 of 4
From the "Import a List" screen, select:
- "Business List" or "Consumer List".
- Browse for your file.
- Name your file. Once you select your file, you can also use this field to change the name of your file. Choose a name that will be descriptive.
- You can "Download a Sample File" here. For best results, your file should be formatted correctly. Review the sample file for best practices. (Accepted file types: CSV, XLS, XLSX, Tab Delimited
Maximum: 50,000 contacts, 100 columns, 30MB) - Click "Next".
List Import Best Practices: We recommend following these optional tips for uploading your spreadsheet:
- Include a header row (ex. First Name, Last Name, Company)
- Remove sensitive data (social security numbers, credit card numbers)
- Remove duplicate records
- Avoid using special characters (#,_...)
- Use consistent formatting (Ohio vs. OH)
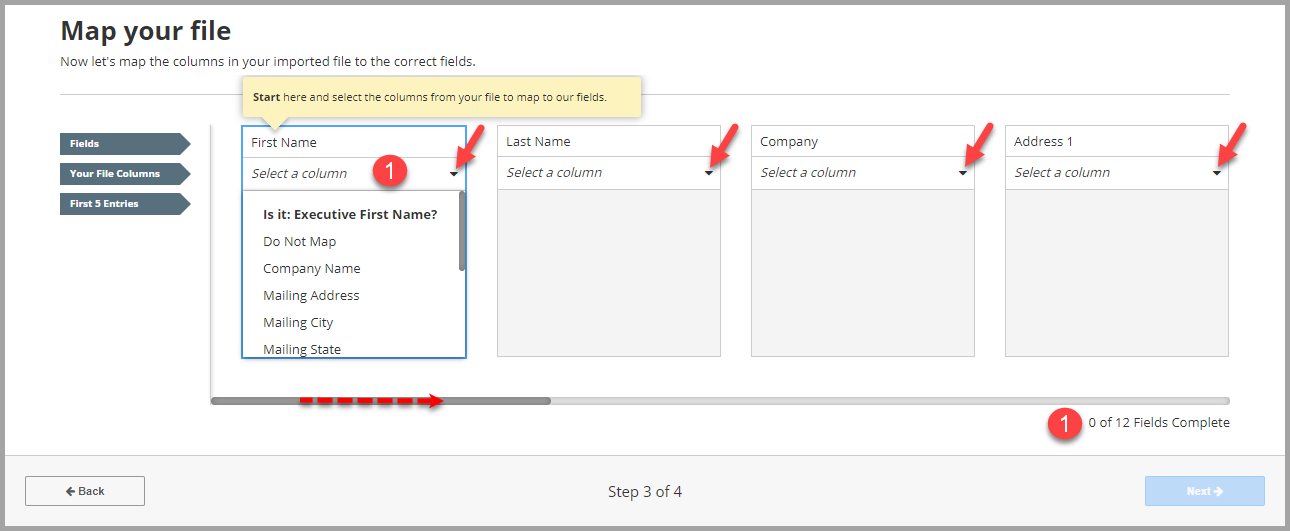
Map your file to Salesgenie - Step 3 of 4
Now let's match the columns in your uploaded file to the fields in Salesgenie.
- For each column, click the down arrow and select the field that matches the Salesgenie field.
- Continue this process until all fields have been matched.
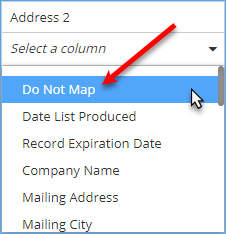
If there is a field that doesn't match or won't be used, select "Do Not Map" from the top of the drop-down list.
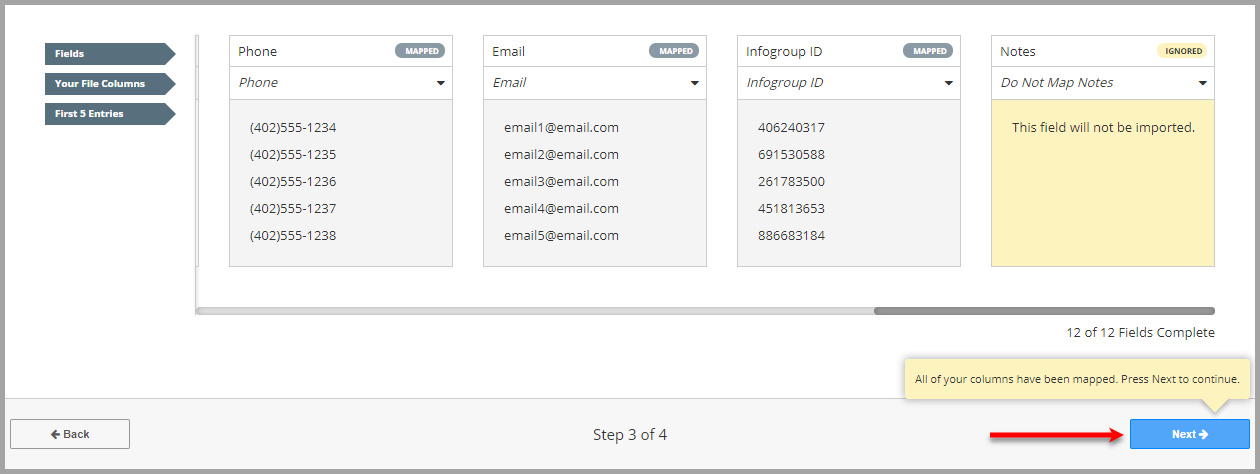
Each time you select the field (1), you will see a sample of the first five records in that field (2). Check to make sure the data matches. See below: First Name field matches the five sample names below. Last Name field matches the records below. Continue this until all fields have been matched.

Once all of your fields have been matched, click "Next" to continue.
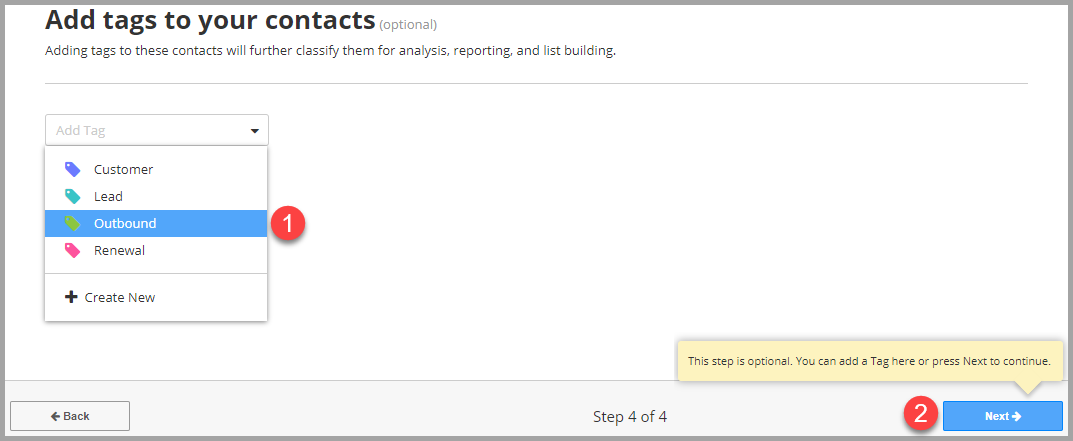
Add tags to your contacts (optional) - Step 4 of 4
Adding tags to these contacts will further classify them for analysis, reporting, and list building.
- Choose a tag (s) or create a new tag. You can add more than one tag to your list.
- Click "Next".
Your list will begin processing. You will be notified via email when your upload is complete.

Depending on the files, processing time can range from a few minutes to a few hours. Larger orders requiring the assistance of a marketing expert may take more time.
When your file has finished processing, you can access your file in the "My Lists" page.
- Click on the list name to view matched records.
- To the right of each list, the three "dots" will open a menu giving you options to:
- Insights
- Delete your list
- Download your list
- View Contacts

PLEASE NOTE: Only customer data records that match our existing databases will be displayed. Any records that do not match our databases will not be displayed. All data and marketing services will be available for your matched customer data records. Future feature improvements will include both matched and unmatched data. Check with your Database Consultant for more details.
Click Here to view Salesgenie's "Customer Data Terms & Conditions".